Monday, January 23, 2012

Project Dashboard

In this installment of my blog I am working on my dashboard. An '88 Civic dashboard is a little bulky and weighs a decent amount, roughly 15 lbs with the gauges. My plan is to lighten up the dashboard and to remove some excess wiring that I won't be needing.

Before I go further, I feel the need to mention that my '88 isn't going to be driven on the streets any longer. The chassis has over 250,000 miles on it and has quite a bit of rust. My Civic was also given to my as a birthday present many years ago so I will always have it. I don't want some idiot driver to take away my precious chassis so no more street driving it is. In light of this I don't need most of the stock amenities.

I am going to attack the dashboard in two segments- first to minimize the wiring and second to remove plastic from the back of the dashboard.

Here's what I started with....

Photobucket

This is stereo harness and cigarette lighter plug that I will be removing....

Photobucket

After cutting off the wiring loom I dissected the harness and de-pinned the wires from the fuse box plugs. It came out looking rather nice...

Photobucket

Photobucket


That didn't turn out to be that much in wiring, but what can I really expect? At least I was able get a few ounces out ha ha.

Photobucket

In the next phase I will be taking a variety of different sized hole saws and will get to work removed plastic material from the back of the dashboard. Stay tuned!

Thursday, January 19, 2012

Chassis Motivation

This is going to be a short and sweet post about the parts I am going to use to motivate my chassis into the 13's.

Currently I have a cable dohc zc transmission with zc 1 - 5 gears. I've been running this transmission for the last two years. Matt from zcspeed.com rebuilt the trans with oem bearings and parts. A p20/booo differential was installed with a Si 4.25 counter shaft and ring gear. We used these parts so I could use standard d series axles. Plus the diff pin in the hydraulic transmission is actually stronger than the L3 series of pins. I already blew up one diff on street tires and didn't want to go through that again. When budget permits an MFactory diff will replace the oem diff.

Connecting the engine's power to the transmission is done through an Exedy 8 lbs Cromoly flywheel and a XTD stage 3 clutch. I know, I know, XTD stuff has a terrible rap and most people think that they are junk. For my less than 150 whp motor I can count on this clutch to not slip with my slicks.

Putting the power to the ground is a pair of Diamond Racing 13x8" wheels with MH 22x8" slicks.


Here are some pictures from last summer. Enjoy!

Photobucket

Photobucket

Photobucket

Photobucket


This summer I am going to make it to the track no matter what!

I recently received my camera back and will take some much needed newer pictures soon. I haven't made much progress yet this year. Beave is still working on my header and it's been a little too cold outside to get much done. Soon I will kick into high gear. Especially when I get my tax return. Then it's really on!

Thanks for reading.

Monday, January 9, 2012

My High Compression Engine

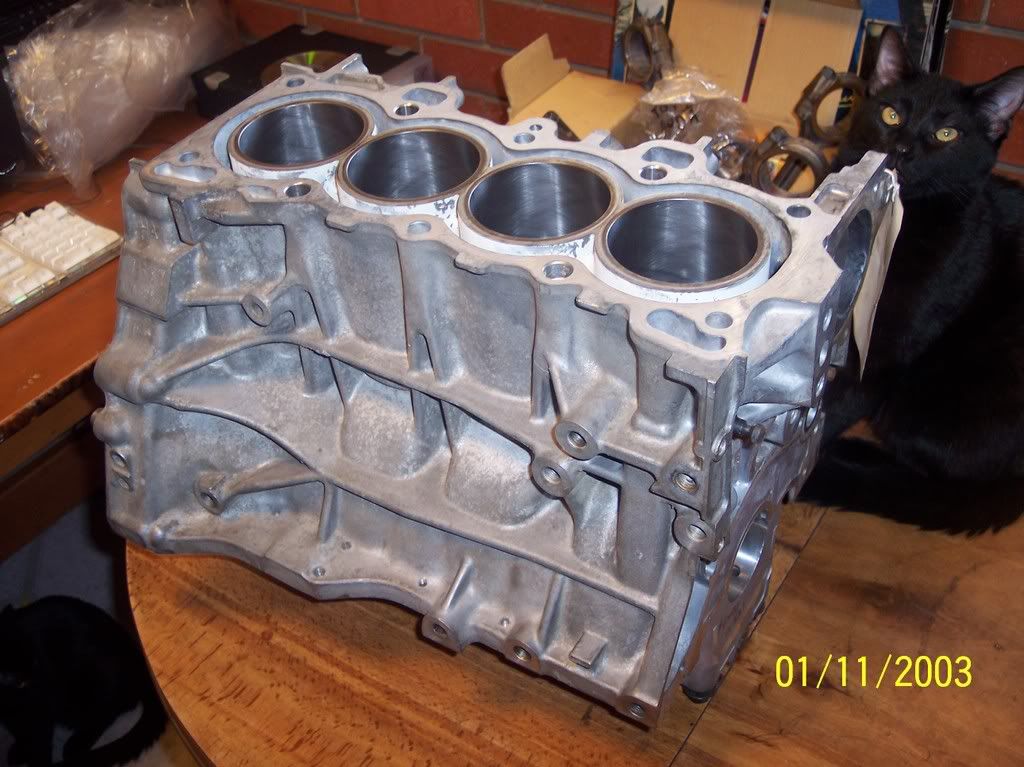
To reach my goal of running 13's all motor I knew that I would need a lot of compression, the biggest engine I could possibly afford and a proper close ratio gear set. Being the broke family man that I am, I stuck with a d16 engine. I started with a d16y7 block and crank. I used this block in the past but had boosted it. In a past life this y7 was fed 13 psi from a 44 trim turbo for two years. I sold the turbo parts I had and tore down the engine for all motor duty.

Compression plays a major factor in making power especially at my elevation. In my area of Colorado Springs, Colorado the elevation is over 6000 feet. My local track is over 5000 feet about sea level and has a dense altitude of over 8000 feet above sea level. The best pistons I could afford is a set of Nippon Racing p29 pistons.

Before you go thinking, "oh God, he has those pistons," hear me out. I'm not going to go into flame propagation or theories on combustion. I know of three cars in Puerto Rico running 12's with p29 pistons. They can get the job done.

I couldn't find a set of p29s in 76mm so I had to settle for 75.5mm. I had my favorite local shop, Lee's Machine bore the block and hot tank it for me. It came out great.

Photobucket
Photobucket
Photobucket

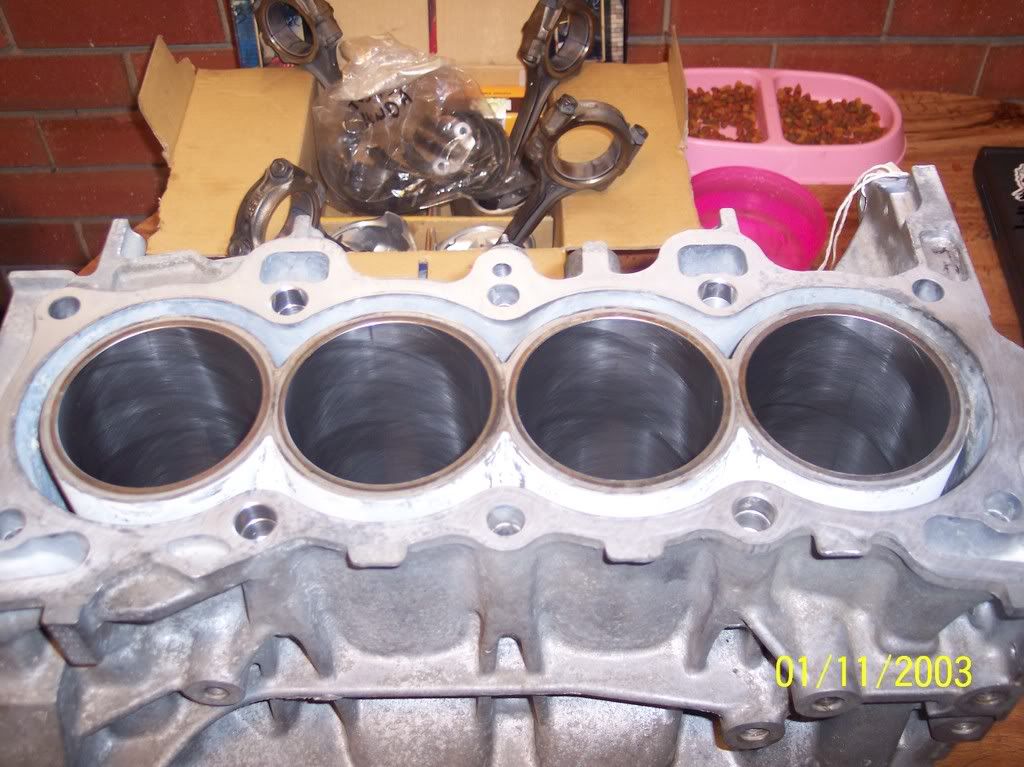
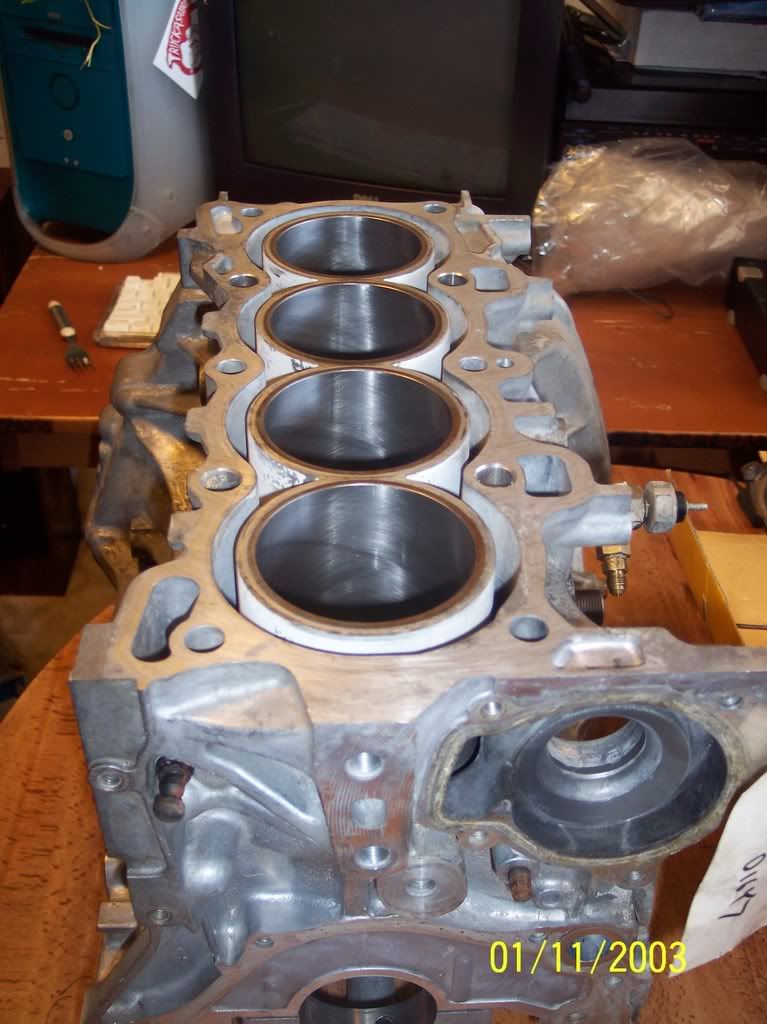
I chose the NPR 75.5mm pistons because of the 30mm compression height. This places the pistons flush with the deck. It looks so nice...

Photobucket
Photobucket
Photobucket 

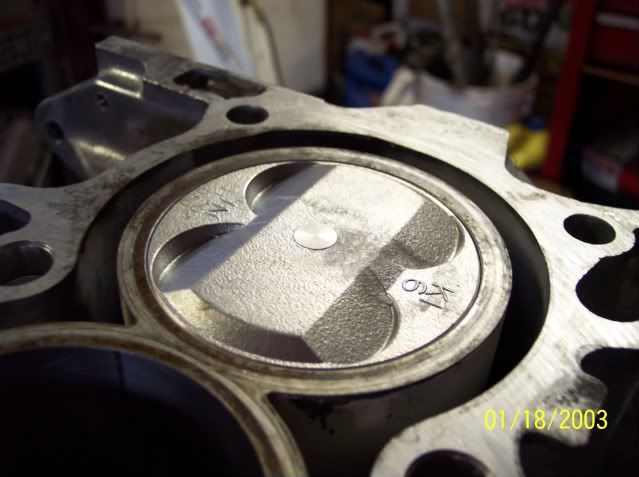
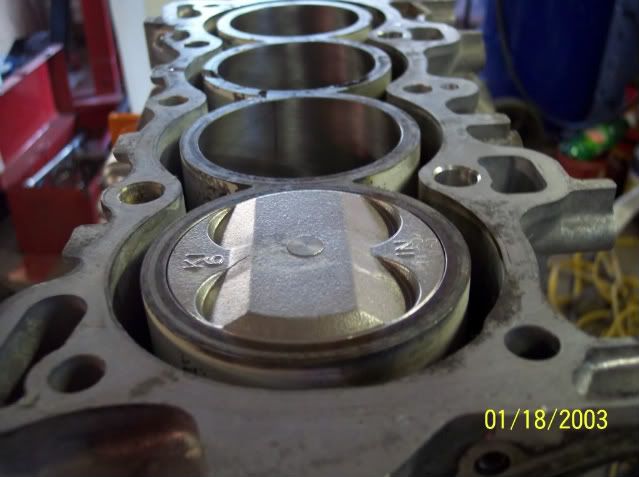
Lee's also set the new pistons on for me. I left the pistons alone and did not modify them. I plan to build a few of these engines and want to take each engine to the next extreme. This engine is pretty basic and will stay that way. Each engine will be an improvement and I have to experiment to see what breaks first.

I used King bearing and ACL thrust washers. Don't ask me, that was the combo that was sent. The crank, the rods and rod bolts are stock and unmodified too. I bought a new oem oil pump from Honda and left it stock too.

After I built this block I had it sitting around in a bag for a couple of months before I needed to use it. I had a ported y7 head with a Delta 272 cam that I was going to run on this bottom end but it dropped a valve with a different bottom end before I could try it on this one. I had a stock y5 vtec-e head laying around and decided to give it a shot. I used an oem y8 head gasket from Honda with stock y5 head bolts. An AEM y8 cam gear, Bisimoto prototype header, 2.5" short exhaust with resonator, stock air box with custom internal air foil, 3" aluminum intake piping, 60mm throttle body, gasket matched Blox intake and DSM 450cc injectors finished out the modifications.

Friday the 13th
Side view

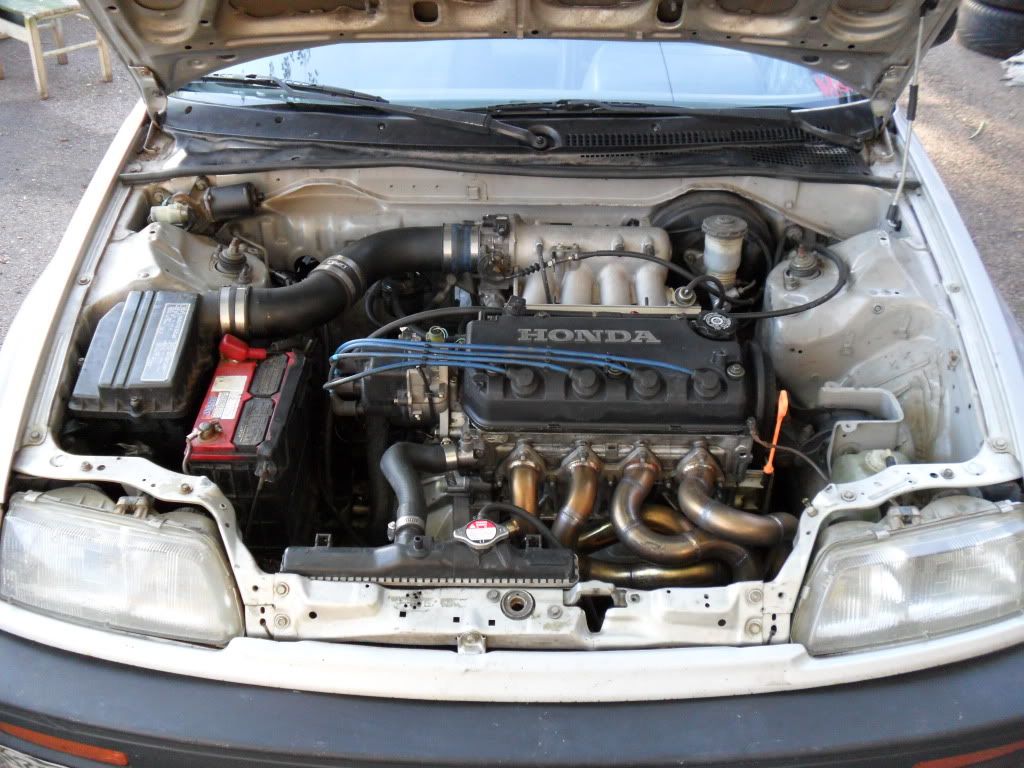
This set up is obdo. I am a tester for the latest ng series of roms that work with TurboEdit and BRE. I have a stock Si distributor, self chipped ps9 ecu, Moates Ostrich 2, Hulog and a Innovate lc1. Using Ecucontrol I was able to tune the engine in rather well.

The engine did have it's quirks. The y5 cam wanted vtec-e to activate as soon as possible. Like at 2000 rpm. Other than that it ran good and seemed to like 25* degrees of total timing and 13:1 afr.

I took this set up to the track once. I had three runs and only one of them went well. The runs were on street tires on the side of the track which lead to horrible 60' foots. Here's a video of the two full runs...


I ran a best of 15.7 @ 88 mph with a 2.58 second 60' foot. Horrible! I know I could do a lot better with a set of slicks and some changes. Before I knew it summer was over and the season ended. That was in 2010.

2011 was a slow year in regards to progress. I had the battle with my Bisimoto header that you can read about in another post. That really held up progress and I wasn't able to dyno the set up or buy other parts. While the Bisimoto header was off I was reduced to using a ceramic coated Pacesetter header. I certainly did not want to go to the track and run with that crappy header.

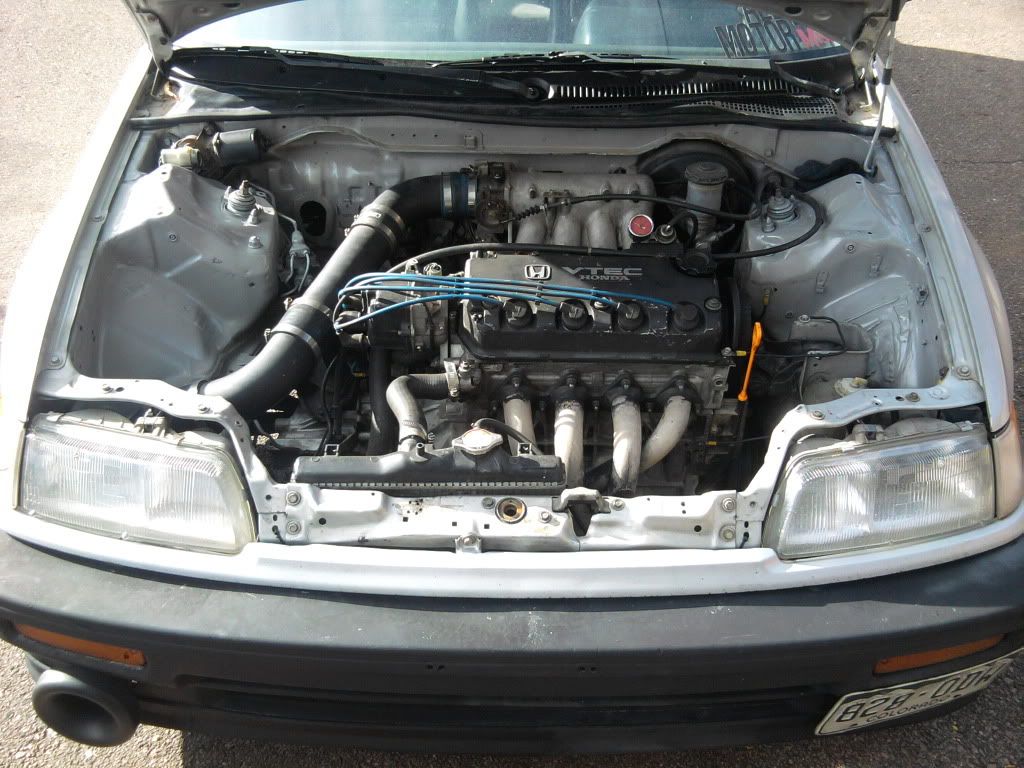
That didn't stop me from making some changes. The first major change was getting rid of the vtec-e parts. I swapped in a y8 cam and y8 rockers. Right away that made a positive improvement in not only the mid range but in the top end as well. I was able to bump up timing to 28* with the y8 cam.

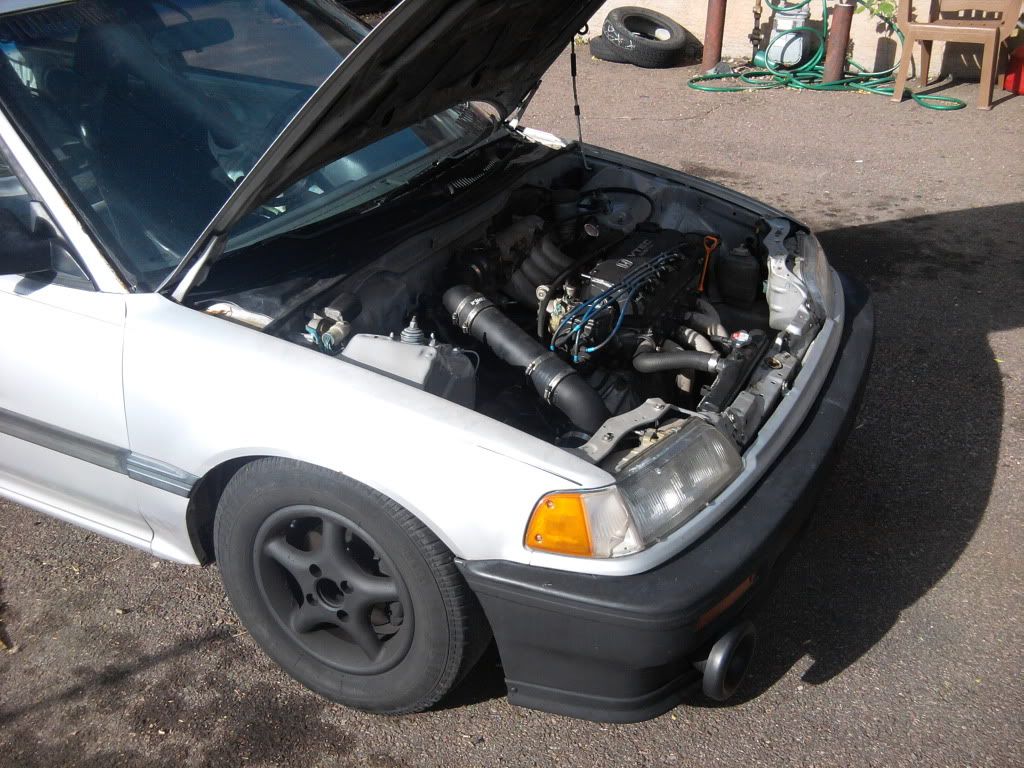
I replaced the stock fuel pump with a Walbro 255 fuel pump. I also ditched the stock air box and went with something that was yielding results for others- a long tube air intake. Not only that, I bought a BPi flow stack to go along with it. I ran the intake down and out of the engine bay. The velocity stack is sticking out of the front bumper. I think it that the long tube intake and velocity stack made more a difference than when I went from the Bisi header to the Pacesetter header.

10-20-11 Engine Bay, New "Bumper Sucker" intake

2012 is already turning out to be a great year. I plan on making more changes, tuning on the dyno, testing parts and hitting the track as soon as it opens! Stay tuned!

My All Motor Story

Hello! My name is Justin and I have an all motor '88 Honda Civic hatchback. My Father and I formed Autobionics which is a small shop specializing in small engines. I have a high compression d16y8 engine that my Father and I built. This is my story.

I'm going to start this blog by posting about my Bisimoto header adventure. My Bisimoto adventure began when he released his new at that time v2 headers. The hype was big about this header and everyone had high expectations. Bisi lived up to the hype by posting a dpfi d15 that gained almost 16 whp by swapping to his v2 header and an oil change. I had to have one of these headers right away.

At the time Bisi had the custom v2 units at $629 shipped and the prototypes for only $449 shipped. The only draw back between the two is his claim of "less than asethetic appealing welds". The prototype seemed appealing to me as a consumer. The word prototype to me means something that has been tested against another. In this case the prototype must have  beaten out another design in order to be good enough for resale. I ordered the header on February 19th and received a tracking number on March 3rd, 2010. The delay in it being shipped to me was due to what Janet at Bisimoto said pressure testing. I received an email stating the my header needed to be pressure tested to ensure that it doesn't leak. I thought cool; they are taking care of me and making sure that the welds can hold pressure.

  When I received the header it looked awesome. To my surprise, it hadn't been run before. Hmmmm. I thought that maybe they sent me the wrong header. Then again there was a sticker on the down pipe that had my last name printed on it. Must be for me. Either way I thought I lucked out and got the real deal for some reason. Either way I was stoked and ready to run this beast. It looked sexy on a table.

Bisimoto D Series Prototype v2 header
Bisimoto D Series Prototype v2 header, Bisimoto prototype D series header
Bisimoto D Series Prototype v2 header

I installed the header right away. At the time I wasn't driving my '88 Civic much as I had a '90 sedan to daily drive in. I was running it open header. I noticed that with my second o2 bung so close to the end of the exhaust tube I was getting erronious AFR readings. My LC1 would read 19:1 at an idle because so little exhaust was passing by it. I added a flexible pipe and 26" long resonator. That helped and I was able to tune my engine. Weeks pass and I ended up wrecking my sedan.  It was totalled out. I had to start driving my '88 while I waited for insurance money to pay for the damage. During this waiting period I put about 2000 miles on my header and started to noticed wildly lean AFRs. I inspected the engine bay and found this:

Broken D series Bisimoto header, Broken primary
 
There were a lot more cracks than that. I don't want to post them all. In fact almost every welded seam cracked. I had a flex pipe and not even an entire exhaust system connected to it. I was not a happy camper.

I contacted Bisimoto. They told me to send them the header back and they would determine the damage. Something felt off about the situation and I decided to have it fixed locally. Luckily I found an awesome welder by the name of Al at Precision Welding. He did a great job of fixing it. Check it out:

V2 Header Fixed!, Front Range Precision Welding  beautiful work!

Can you tell which seams Al welded and which seams are left from Bisi's guy?

For awhile this set up worked. I drove it for about another 6 months before disaster struck again. This time it was right after the collector and the entire downpipe had broken off. I was disappointed but I wasn't ready to quit. I decided to either have Al weld the pipe together and try again or I was going to find someone else to not only fix but make it better too. That's where Matt aka The Acid Beaver came into play. He agreed to not only fix my header but to improve it as well.

We all know that Bisi is an Engineer. There are a lot of Engineers in the world today and not every Engineer is perfect. Due to my engine being only 1611cc, the 2.5" collector and down pipe was a little large. It was obvious as there wasn't enough velocity to give my wideband's o2 sensor any exhaust gases to read. The Beave and I decided to choke the collector down and to add a megaphone reverse cone into the mix. Here's a few pics of Matt getting started...

1.9.12 Header Updates, I can't believe that it fits this well!
1.9.12 Header Updates, Round 2 and Beave has the angles perfect! It could not fit better.
1.9.12 Header Updates, Another shot of well executed pie cuts
1.9.12 Header Updates, Look how close it is to the oil pan. Perfect. 

It's looking sharp so far!